Summer Sampler Series : Lucky Pieces
Lucky Pieces is the eighth quilt block we are going to make for the Summer Sampler Series. It can be found in Chapter 22 - Eight-Pointed/45 Degree Diamond Stars on Page 455, Block 3752b of Barbara Brackman's The Encyclopedia Of Pieced Quilt Patterns. It was in the early 1800's when the Eight-Pointed quilt block pattern appeared. Brackman's book contains 140 Eight-Pointed/45 Degree Diamond Stars patterns, signifying the abundance and historical popularity of this variety of quilt blocks.
The Lucky Pieces quilt block was first seen in the The Nancy Page Quilt Club, a syndicated column written by Florence LaGanke Harris which appeared in mail order magazines in the 1920's to the 1930's. While I was researching Nancy Page, I discovered that by the end of the 1920's, quilters were looking for more modern patterns and designs. Sound familiar? I love that so many aspects of the "modern quilting movement" today really trace back generations.
The Lucky Pieces quilt block can look different depending on how you lay out your colors. This tutorial uses all half square triangles and the cutting directions below are based on my color layout in the graphic at the top of the blog post. I know we have thrown some challenging blocks at you over the last week, so sit back, relax, and get ready for an easy one! :)
Lucky Pieces Quilt Block Tutorial
Please note, all seams are 1/4"; Final block size 12.5" unfinished
Step 1. Cut your fabric:
| Pattern Piece | Fabric Color | ||
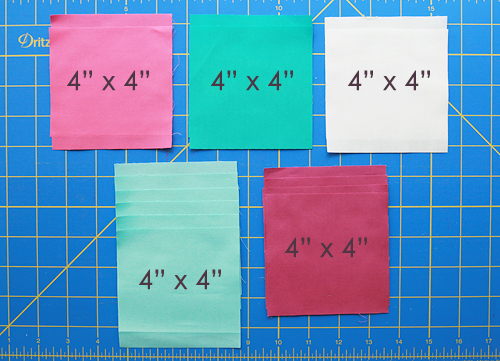
| Center Pinwheel | Cut 2 | 4” x 4” | White |
| Center Large Star | Cut 4 | 4” x 4” | Purple |
| Corners 1 | Cut 2 | 4” x 4” | Dark Turquoise |
| Corners 2 | Cut 2 | 4” x 4” | Pink |
| Background | Cut 6 | 4” x 4” | Light Turquoise |
Take all of your squares and cut them diagonally into half square triangles.
Step 2. Lay out your HSTs into the design of the quilt block as shown below.
Step 3. Sew each set of HSTs into squares. Trim your squares to 3.5". Lay out your resulting squares into the design of the quilt block again.
Step 4. Sew your squares together. You're done!


