Radiant Splendor ~ A Quilt Block Tutorial
Radiant Splendor Quilt Block Tutorial by Fresh Lemons Quilts
It's been quite some time since I've been able to sit down, relax and look through my favorite block reference books. A couple weeks ago, I pulled out Nancy Cabot's Quilt Collection, complied by Rose Lea Alboum. You can see more about it on my blog here and ordering information here. This time as I was flipping through the pages, this block caught my eye, Cubes and Tiles (1933).
Cubes and Tiles Quilt Block - Nancy Cabot 1933
I decided to see if I could find a bit more information about it, so I search for it in my other favorite block reference, Barbara Brackman's Encyclopedia of Pieced Quilt Patterns. (Which by the way, is now available to buy as a PDF download!) It turns out, this block has been, well, around the block a few times! It was listed under 5 different names, from 5 different publications. The oldest I saw was a Ladies Art Company quilt pattern catalog from the late 1800's, under the name Stars and Cubes. Pretty cool! And since everyone else came up with their own name for this block, I decided to call mine Radiant Splendor. :)
I sat down to do a little photoshop work to see if I could figure out how to put this block together. Turns out it's not that hard - as long as you love making flying geese! I've put together a tutorial for anyone interested in making one of their own.
Radiant Splendor Quilt Block Tutorial by Fresh Lemons Quilts
Radiant Splendor ~ A Quilt Block Tutorial
20-1/2" x 20-1/2" unfinished quilt block
We are going to follow the below construction diagram to make this block. We will begin with the flying geese, then piece center star, followed by the border stars and finally sew those components together to make the final block.
Radiant Splendor Quilt Block Tutorial by Fresh Lemons Quilts
Cutting Instructions
Pattern Piece
Fabric
Background
Cut 4
6-1/2” x 6-1/2"
White
Background
Cut 12
2-1/2” x 2-1/2”
White
Background
Cut 20
2-1/2” x 4-1/2”
White
Center Star
Cut 1
4-1/2” x 4-1/2”
Purple
Center Star
Cut 8
2-1/2" x 2-1/2"
Purple
Border Stars
Cut 4
2-1/2” x 4-1/2”
Yellow
Border Stars
Cut 32
2-1/2" x 2-1/2"
Yellow
Block Instructions This block contains 20 flying geese components. Let's make those first.
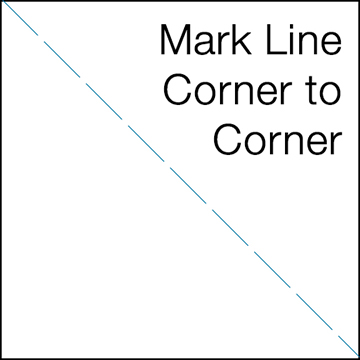
Step 1: Using a marking tool (disappearing ink pen, pencil, hera marking tool, chalk, etc), mark your (8) 2-1/2" x 2-1/2" Purple Squares and your (32) 2-1/2" x 2-1/2" Yellow Squares from corner to corner on the wrong side of the fabric, along the diagonal.
Radiant Splendor Quilt Block Tutorial by Fresh Lemons Quilts
Step 2: Gather your (20) 2-1/2” x 4-1/2” White Rectangles. Take (1) 2-1/2” x 4-1/2” White Rectangle and place (1) 2-1/2” x 2-1/2” Purple Square, right sides together as shown, lining up the fabric on the short end of the rectangle. Stitch along the marked diagonal line.
Radiant Splendor Quilt Block Tutorial by Fresh Lemons Quilts
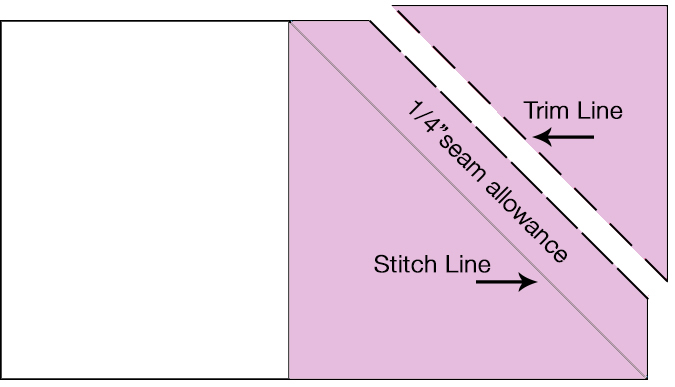
Step 3: Using a quilting ruler, trim the stitched 2-1/2” x 4-1/2” rectangle 1/4" past your stitch line, as shown.
Radiant Splendor Quilt Block Tutorial by Fresh Lemons Quilts
Press your fabric open.
Radiant Splendor Quilt Block Tutorial by Fresh Lemons Quilts
Step 4: Place your next 2-1/2” x 2-1/2” Purple Square, right sides together as shown, lining up the fabric on the other short end of the rectangle. Stitch along the marked diagonal line.
Radiant Splendor Quilt Block Tutorial by Fresh Lemons Quilts
Step 5: Once again using a quilting ruler, trim the stitched 2-1/2” x 4-1/2” rectangle 1/4" past your stitch line, as shown.
Radiant Splendor Quilt Block Tutorial by Fresh Lemons Quilts
Press your fabric open.
Radiant Splendor Quilt Block Tutorial by Fresh Lemons Quilts
You now have a 2-1/2" x 4-1/2" Flying Geese unit.
Step 6: Repeat the above instruction to piece a total of (4) Purple flying geese units and (16) Yellow flying geese units.
Now that you've made your 20 flying geese units, we will make the Purple Center Star.
Step 7: Take your (4) Purple Flying Geese Units, (1) 4-1/2" x 4-1/2" Purple Square, and (4) 2-1/2" x 2-1/2" White Squares, and lay them out as shown.
Radiant Splendor Quilt Block Tutorial by Fresh Lemons Quilts
Step 8: Stitch together the segments into three rows as shown.
Radiant Splendor Quilt Block Tutorial by Fresh Lemons Quilts
Step 9: Stitch your rows together to form a finished 8-1/2" x 8-1/2" block, as shown.
Radiant Splendor Quilt Block Tutorial by Fresh Lemons Quilts
Set aside. We will now assemble the Yellow Border Stars.
Step 10: Take (4) of your Yellow Flying Geese Units, (1) 2-1/2" x 4-1/2" Yellow Rectangle, and (2) 2-1/2" x 2-1/2" White Squares, and lay them out as shown.
Radiant Splendor Quilt Block Tutorial by Fresh Lemons Quilts
Step 11: Stitch the top row of (2) 2-1/2" x 2-1/2" White Squares and (1) flying geese unit together, as shown. Stitch the center 2-1/2" x 4-1/2" rectangle to (1) flying geese unit, as shown.
Radiant Splendor Quilt Block Tutorial by Fresh Lemons Quilts
Step 12: Stitch the remaining (2) flying geese units to the center pieced unit, as shown.
Radiant Splendor Quilt Block Tutorial by Fresh Lemons Quilts
Step 13: Piece the assembled top row to assembled bottom section, as shown, resulting in a 6-1/2" x 8-1/2" Yellow Border Star.
Radiant Splendor Quilt Block Tutorial by Fresh Lemons Quilts
Step 14: Repeat the above steps to make 3 more Yellow Border Stars, for a total of 4 Yellow Border Stars.
Now we are going to assemble all your pieced components into a finished block.
Step 15: Lay out your (4) 6-1/2" x 6-1/2" White Squares, (4) Yellow Border Star components and (1) Purple Center Star as shown.
Radiant Splendor Quilt Block Tutorial by Fresh Lemons Quilts
Step 16: Stitch each row of blocks together, as you would a 9 patch. Stitch your rows together.
Congratulations! Your block is now finished!
Radiant Splendor Quilt Block Tutorial by Fresh Lemons Quilts


